Saturday, March 31, 2012

that stinks


One thing I've noticed about living in the midwest versus Southern California is that I very often have the problem of lingering food smells in my apartment from cooking. In CA, my family would have the doors and windows open most of the year and the natural circulation of air would take cooking smells out of the house without a problem. I've discovered that because of more extreme weather in IL (snowy winters and humid summers) I am less able to utilize this technique. But what am I supposed to do when I can't stand the smell of food in the apartment?! I've used a four step process to help alleviate this nagging problem when cooking with the window or doors open is not an option. It's not perfect but it helps.

Step 1: Before cooking, close all doors to bedrooms or bathrooms when cooking. This is a preventative measure and will hopefully keep cooking/food smells out of these rooms.

Step 2: During cooking, use any venting fans (like above the stove) available in the cooking area. If you live in an apartment like me try propping your apartment door open to help draw smell out of your living space and in to the hallway (this plus opening a window or sliding door to the outside is best but we're assuming you can't).

Step 3: After eating and washing dishes, clean any surfaces used in cooking (stovetops, counters, and even the floor around your stove) with a vinegar/water solution. I use equal parts of water and white vinegar in a spray bottle. This is not only good to disinfect your surfaces but cleaning after each time you use the stove is good for general cleanliness in the kitchen. The use of vinegar will help dissipate the smell of food.

If at this point the smell of food is still lingering I have two options for Step 4.

Step 4, option A: Light a candle or use a spray that is specifically made to deodorize air. I've used "Good Air: Just Plain Fresh" candles from Yankee Candle and they work pretty well. I've also found that the smell of brewed coffee is also a good way to deodorize air.


Step 4, option B: This option will work better during the winter months rather than the hot, humid months. Turn off any heaters that maybe on and open all your doors and windows at this point and hide in your bedroom with the door closed where it's warm and hopefully not smelly (because of Step 1) and hang out there for a good hour or so until the air circulates the smell out of your apartment or home. If you have a portable fan, turn it on and use it. We're trying to push the smelly air out and bring fresh air in. If you're comfortable enough it's best to keep your front door open as well but do this with caution if you live in an apartment (since you will be tucked away in a closed room with your front door open). After an hour, put a sweater on and go close all the opened windows and doors. Hopefully at this point the bulk of the smell will be gone and you'll be able to bring these rooms back up to a livable temperature.  

Friday, March 23, 2012

march showers


Mark always describes springtime in IL as a battle between winter and summer. One day it will be snowy and cold and then next it will be humid and hot. Today, summer is winning because we have warm temps but lots of rainfall. Sometimes I feel like this place becomes a tropical rainforest with its constant humidity and random showers. For me, today's weather is wonderful. I'll take rainy and cloudy over hot and humid any day.

Wednesday, March 21, 2012

unsolicited wedding advice wednesdays : craft supplies


Ok, ok, I know I said I was going to take a break but I'm often an eater of my own words so here I am today. So I saw this post, here, and I went to an awesome website called Create for Less which appears to be an amazing place to buy craft supplies online. DIY weddings and events are all the rage and if you're like me you're definitely still feeling the impact of the recession.  So, as someone who definitely knows how expensive a crafting habit can be and as someone who never wants to pay full price this seems to be a match made in crafting heaven. If you're unsure about an item I'd suggest scoping it out in person at your local craft store first before purchasing.

Tuesday, March 20, 2012

we interrupt the regularly scheduled program


As you might have noticed I haven't been able to regularly post as of late. Things are moving and shifting at home so I think I will have to take a short hiatus until things settle down. See you soon!

Wednesday, March 14, 2012

unsolicited wedding advice wednesdays : what to register for


I saw a news report on the potential dangers of Pyrex glass bakeware shattering at home. They cited a Consumer Reports study that was done and the video footage of their testing is pretty dramatic. They found that newer Pyrex sold in the U.S. is made from soda lime glass and no longer borosilicate glass like how vintage Pyrex was made. Soda lime glass will shatter once taken from normal oven temperatures and placed on a wet countertop which "shocks" the glass and causes it to shatter. I don't know if shatter is the right word, I'd almost call it "explode." Cook's Country (part of America's Test Kitchen) also admitted having the same experience with their Pyrex glass exploding from oven to counter on their Season 4 episode: "Not Just for Kids."

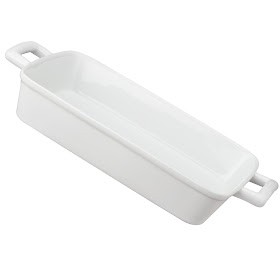
This doesn't mean you have to get rid of your Pyrex bakeware but you just need to be careful to place hot glassware on a trivet or dish towel (which is always a good idea anyway). But if you're an absent-minded cook it might be a good idea to get a new baking dish. Cook's Country tested several baking dishes specifically for broiler usage because this is obviously the highest temperature that the bakeware would need to withstand. They tested several materials like ceramic to cast iron and found that all the products performed the same. The only dividing factor was design. Cast iron was much too heavy and some product handles had only a thin lip or no handle at all! In the end they suggested the HIC Ceramic Lasagna Pan which is lightweight and has very grip-able wide handles.

Tuesday, March 13, 2012

enchilada casserole


When I used to work at a preschool in Fountain Valley, CA one of the perks of the job was a free lunch. We basically got to eat what the kids were served and one of my favorite dishes there was Enchilada Casserole. My take on this casserole adds veggies, beans and all the fixin's on top. I used zucchini but you could use sautéed onions and bell peppers or add spanish rice. Or you could omit all the veggies and beans, it's your call! One tip that I learned from our preschool cook is to put some enchilada sauce on the bottom of the baking dish to ensure that the bottom tortillas sufficiently soak up the delicious sauce and that they don't stick to the dish. Of course, I forgot to do that today. I swear, my mind has never the same after the wedding. 

Enchilada Casserole
7 flour tortillas, soft taco size - cut 6 in half and 1 in thirds (you could corn tortillas if you prefer and make this dish gluten free)
1.5 lb protein (I used al pastor meat from the Mexican market but you can use taco beef or turkey, chicken, or whatever you like)
2 medium zucchini, cut to 1/2 pieces and blanched
3 scallions, diced
3-4 cups of shredded cheese
1 - 15 oz. can of black beans, rinsed
1 - 28 oz. can of red enchilada sauce

1. Blanch the zucchini pieces in salted water. About 3 min, just until zucchini is cooked but definitely not mushy! Remove from the water with a slotted spoon. Meanwhile, cook the protein in a pan and remove from heat.  2. Begin building the casserole in a 13"x19" baking dish. Spread 3/4 cup of enchilada sauce to cover the bottom of the dish. Line the dish with 4 tortilla halves (cut side toward the edges of the dish) and cover the exposed center with one of the 1/3 tortilla pieces. Spread another 3/4 enchilada sauce on top of the tortilla layer. Evenly cover the tortilla layer with half of the protein, beans, blanched zucchini, scallions. Top with 1 cup of cheese.  3. Repeat with a layer of tortillas, 3/4 cup of enchilada sauce, and protein and veggie toppings with cheese.  4. Top the second layer with the last layer of tortillas, remaining enchilada sauce, and 1-2 cups of cheese.  5. Bake in a 375 degree oven, loosely covered with foil for 20 min., remove foil for the last 5 min. to melt the cheese. Everything is already cooked so we're just basically warming everything and making things gooey. Let the casserole stand for 10 min before serving. Top with sour cream, cilantro, chopped tomatos, guacamole, diced red onions, whatever!


Monday, March 12, 2012

basic chili with kidney beans


Winter in IL has been rather mild this year but it's definitely colder than this CA girl is used to. One of my favorite winter meals is a bowl of chili with all the works. Haha, well actually I enjoy a bowl of chili anytime of the year. Some people don't realize that chili is a soup and that it can be eaten on its own. The kind of condiment chili found on top of chips, burgers, hot dogs, and salad is usually a thickened version. Chili is definitely better the next day so this is something that can be made ahead. I usually make a batch and freeze half of it by pouring a serving size in a sandwich bag.

Basic Chili with Kidney Beans (adapted from ATK)
Group A:
2 medium onions, diced
2 medium bell pepper, diced
10 garlic cloves, minced
1 jalapeño, seeded and diced (optional)
1/4 cup chili powder
1 Tb cumin
1 Tb red pepper flakes
1 Tb paprika
2 tsp coriander
1 tsp oregano (or Italian seasoning)
1 tsp cayenne pepper (1/4 tsp for a less spicy chili)

Group B:
2 lbs 85% lean beef or ground turkey (turkey is obviously much healthier)

Group C:
2 - 15 oz. cans dark red kidney beans, rinsed
1 - 28 oz. can diced tomatoes
1 - 28 oz. can tomato puree

1. Cook Group A in a heavy-bottomed non-reactive Dutch oven until softened and spices have bloomed (when you can smell the spices). Add 1/4-1/3 cup of flour if you want this to be a thick condiment chili. 2. Add half of Group B, breaking the meat in to pieces with a wooden spoon and no longer pink. Add remaining meat and repeat. Bring the soup to a boil and simmer for 1 hour while stirring occasionally. 3. Season with salt and pepper to taste and simmer for another hour.

Top with shredded cheese, sour cream, cilantro, diced fresh tomatoes, scallions, avocado, or red onion.

Wednesday, March 7, 2012

unsolicited wedding advice wednesdays : choose the right font


Snippet & Ink recently posted her 50 favorite fonts for creating an expensive and custom look for weddings. I definitely don't have the expendable income that I used to so I can't buy all the beautiful fonts that I would love to buy but I definitely downloaded the free fonts that I didn't already have! On a side note if you don't already know about Lost Type Co-Op then do your font toolbox a favor and download all their fonts ... for free! Unless you have money then definitely donate what you can ;D 

Monday, March 5, 2012

black bean quesadillas


Mark is doing "The Biggest Loser" at work and I'm always attempting to lose weight (though I never seem to want to work out) so last night I made some vegetarian black bean quesadillas for dinner. I followed a recipe from Budget Bytes, here, but I added some red bell pepper, scallions, and used one can of corn rather than just 1 cup to the mix. The recipe considers one quesadilla as a serving but Mark and I both had 2 with chips and salsa. ;P Haha, hey, we did good with the veggies maybe not so much with the portions. I froze the other 6 quesadillas, easy peezy. Personally, I didn't miss the meat in the recipe because it was tasty and hearty enough without it but when I asked Mark if he noticed, he said he did. Oh, my hubby and his love affair with meat.

Thursday, March 1, 2012

iPhone accessories


Did you know that you can buy different camera lenses for your iPhone? Actually, the website says it works for most camera phones too. This is just crazy to me. Check them out at Photojojo, here. The lens attaches with a magnetic ring and if you're so inclined you can buy a lens wallet for all your iPhone lens accessories. They even have a macro lens band that can slip off your wrist and on your iPhone. Crazy!